Install hexo
安装完成后,需要安装hexo:
1 | sudo su |
1 | npm install hexo --save |
建站
1 | hexo init |
安装依赖包:
1 | npm install |
安装一下hexo-deployer-git
1 | npm install hexo-deployer-git --save |
Hexo 使用自定义模板
- 新建命令行
1 | hexo new [layout] <title> |
Layout 介绍

- post: saved in source/_posts (public)
- page: saved in source
- draft: saved in source/_drafts (private)
- self-defined layout: saved in source/_posts (public)
自定义模板
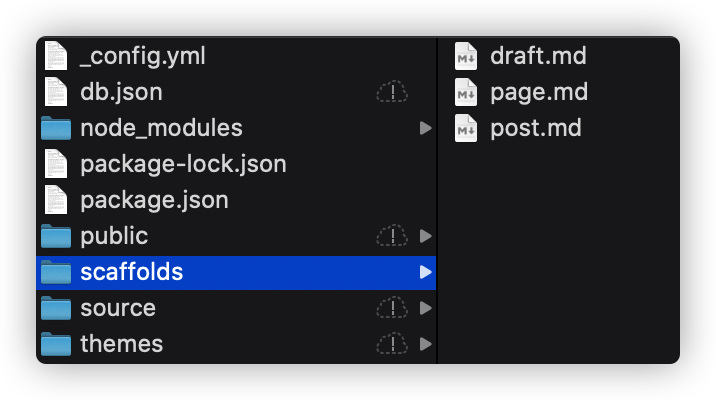
用户自定义模板在 scaffolds 文件夹中,比如 “self-module.md”
命令行如下
1
hexo new self-module 【module name】
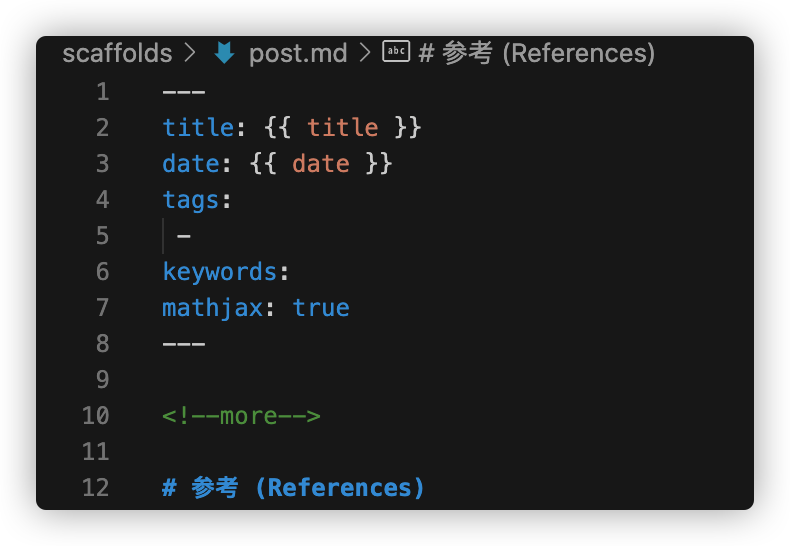
模板内容,以后可以通过
next new self-module [blog name]就可以以这个模板初始你的博文内容如下
Hexo 免密部署 (hexo deploy)
生成 SSH 秘钥
1 | $ cd ~/.ssh |
将整个 [your_email@example.com] 替换成你们的 github 账户注册邮箱
提示输入密码
直接 enter 键,也可以设置 ssh 的密码,以后 deploy 的时候每次也需要使用这个密码,建议直接 enter (用enter 替代 [Type a passphrase])
1 | Enter passphrase (empty for no passphrase): [Type a passphrase]Enter same passphrase again: [Type passphrase again] |
秘钥生成成功
1 | Your identification has been saved in /home/you/.ssh/id_rsa.Your public key has been saved in /home/you/.ssh/id_rsa.pub.The key fingerprint is:…………………此处是密钥内容…………………… your_email@example.com |
复制秘钥至你的 GitHub 账户
1 | vim i |
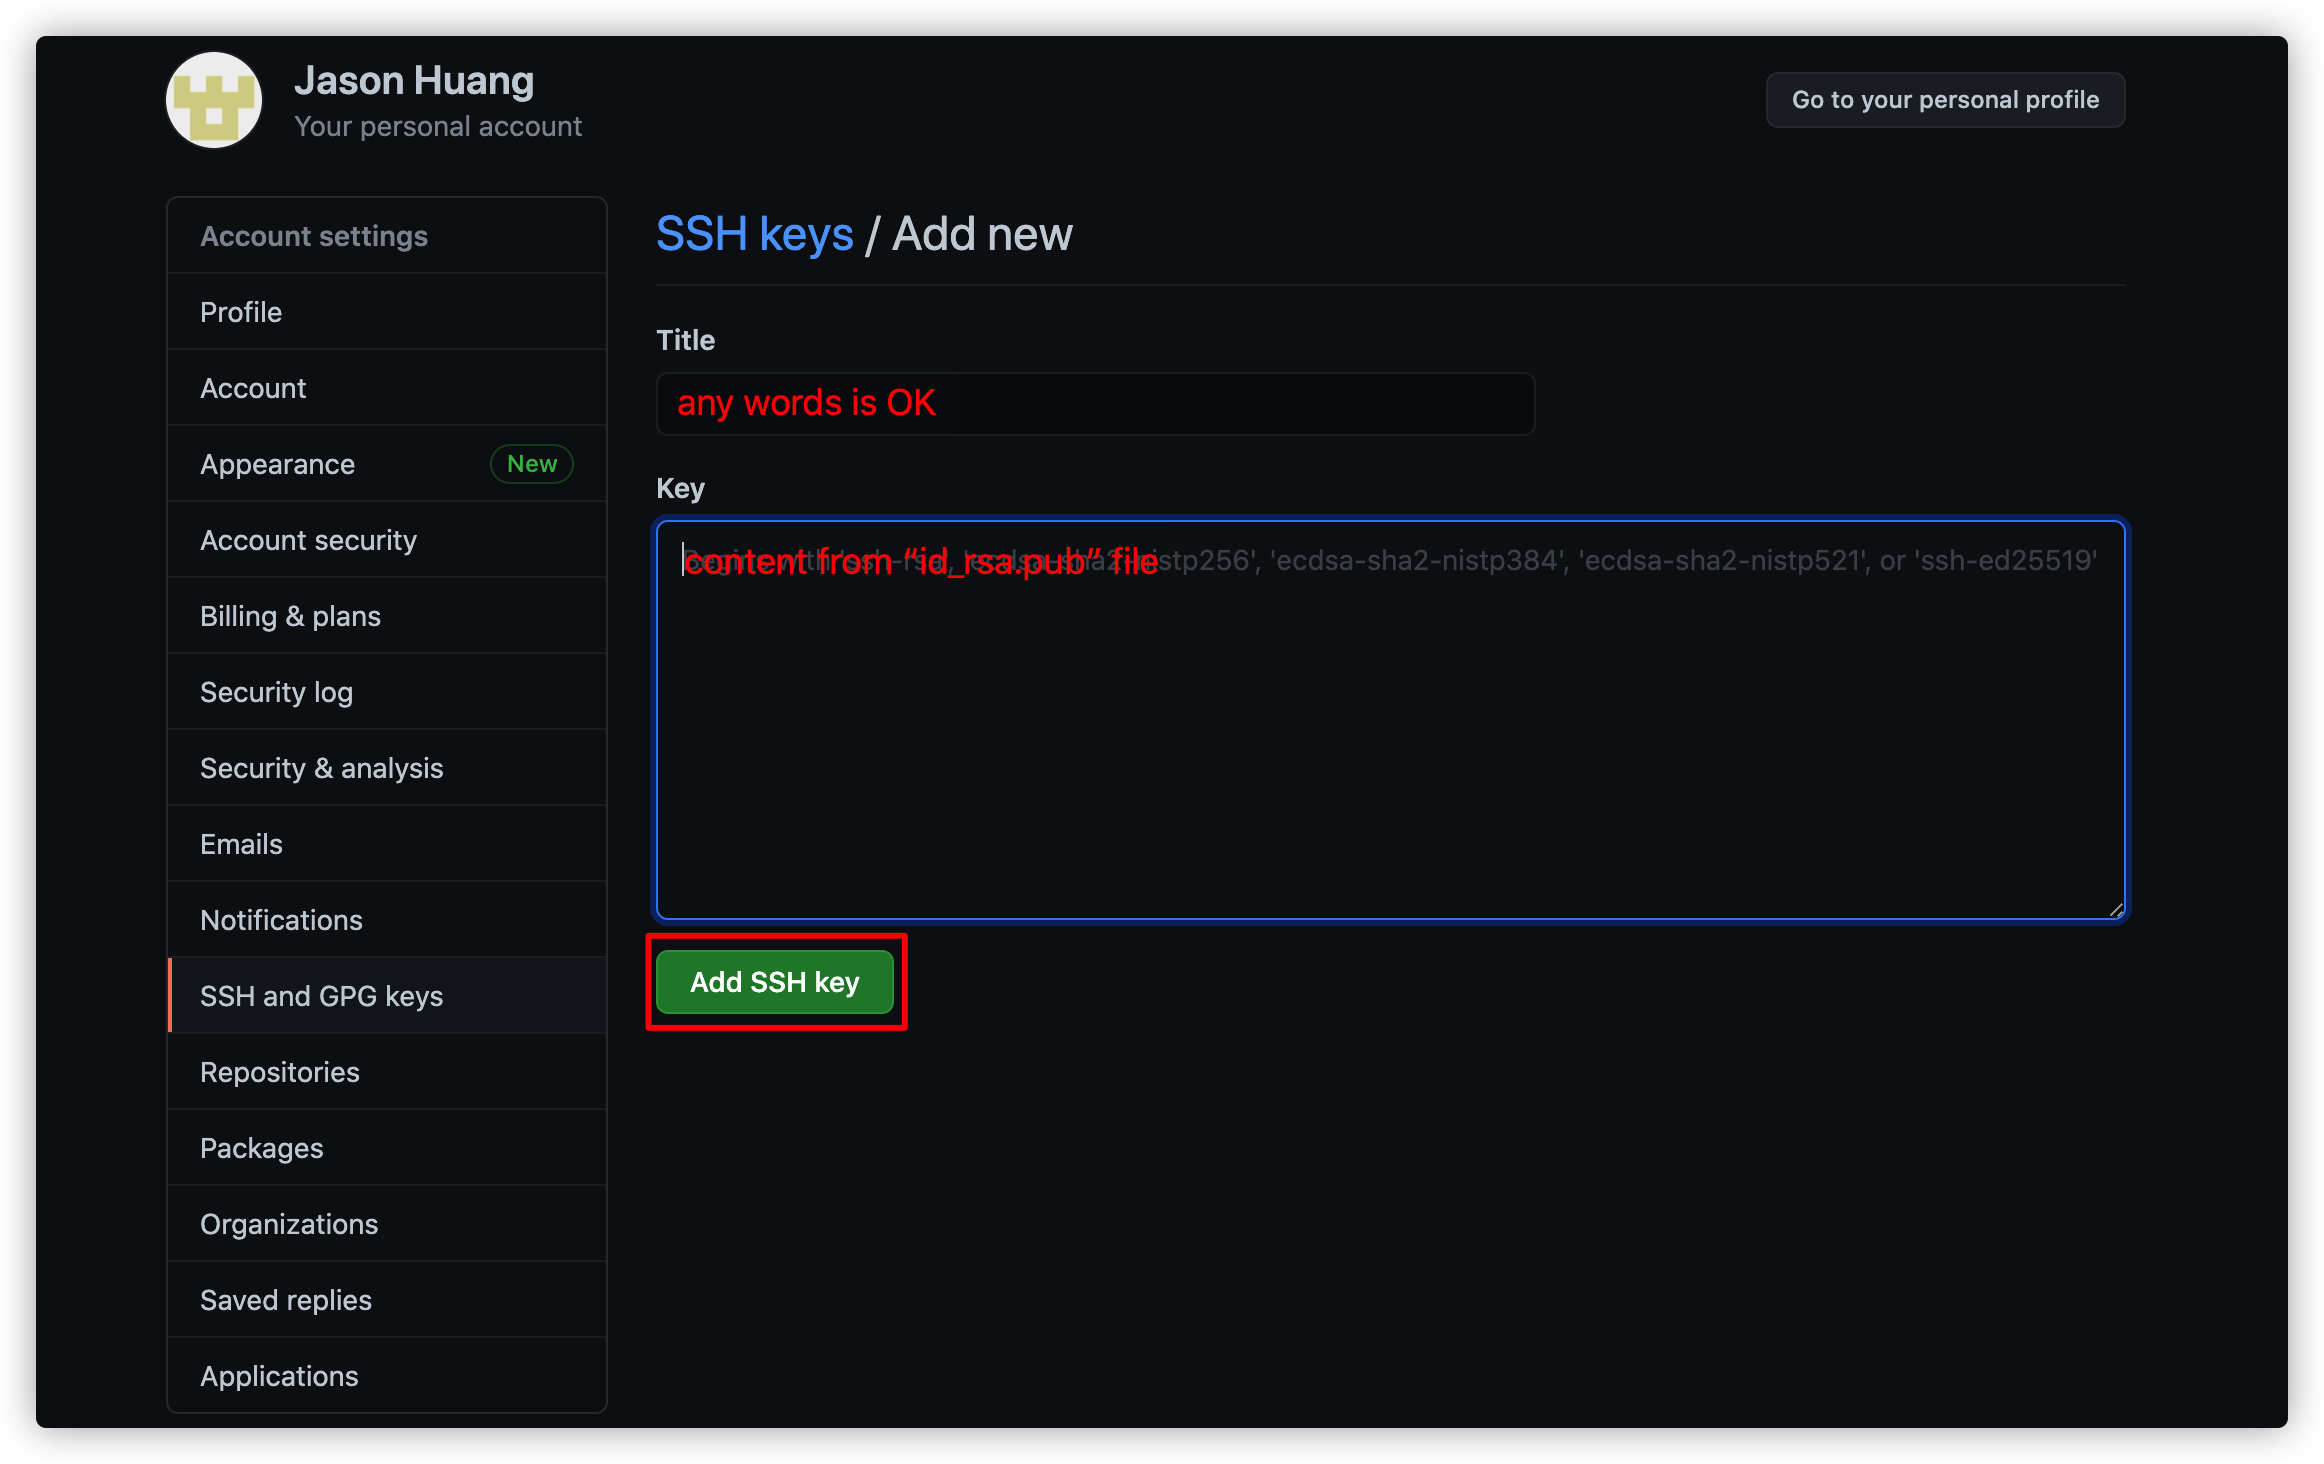
将文件 “id_rsa.pub” 所有的内容复制出来粘贴到
在 jason-huanghao.github.io 的首页菜单栏中点击 Settings --> Deploy keys --> Add deploy key,然后将生成的 id_rsa.pub 中的内容全选复制到 key 输入框中,然后点击 Add key 完成添加公钥

测试是否成功
1 | ssh -T git@github.com |
收到下面提示,则配置成功
1 | Hi username! You've successfully authenticated, but GitHub does not provide shell access. |
**配置hexo/_config.yml**
打开 Hexo 的配置文件 _config.yml ,把 deploy 下的 repo 改为
1 | # Deployment## Docs: https://hexo.io/docs/one-command-deploymentdeploy: type: git repo: git@github.com:jason-huanghao/jason-huanghao.github.io.git branch: master |
Hexo 命令详解
hexo init [folder] 这个命令是 Hexo 初始化命令。[folder] 表示你要初始化的文件夹。如果你要初始化本地,直接 hexo init . 。
hexo new [layout] 这个命令是新建文章或页面用的命令。其中 [layout] 表示他的模板(即页面或者文章),表示标题。
用法:
hexo new post 001 ,表示新建了一个标题为 001 的文章。 hexo new page 001 ,表示新建了一个标题为 001 的页面。 如果你不想在终端中新建文章或页面,可以直接在 博客根目录/source/_post/ 目录下创建 Markdown 文件写文章。或者在 博客根目录/source/ 目录下创建一个文件夹,然后在新文件夹里创建 index.md 写页面即可。
:::tip 提醒
当你新建页面后,页面的链接就是你页面所在的文件夹的名字。
例如:我在 博客根目录/source/ 下新建了一个名为 test 的文件夹,然后在 test 文件夹下写 Markdown 文件,那么这个页面的链接就是 网址/test。
hexo server 当你要在本地查看网站的时候,就可以用这个命令。
默认在 http://localhost:8080/ 这里,可能会不同,注意提示信息即可。
:::tip 提醒
如果你想要换端口号(上面的 8080 就是端口号),可以在终端里输入 hexo s -p 端口号。
如果遇到端口占用,在hexo/_config.yml 中添加下面语句修改 hexo 启动端口号
1
server: port: 4001 compress: true header: true
hexo generate 这个命令是生成网站静态文件的时候用的,生成后网页将会放在根目录下面的 public 文件夹里。
hexo deploy 这个命令用来部署网站,使用此命令将会把生成好的页面(即 public 文件夹里的内容)部署到指定的地方上。
hexo clean 这个命令用来清空 public 文件夹。
hexo version 这个命令用来输出你所使用的 Hexo 目前的版本号。
部署本地文件到GitHub上
1
$ hexo clean
Hexo -v 查看 hexo 版本
Next 主题使用
下载 Next 主题
cd themes 文件夹
1 | git clone https://github.com/iissnan/hexo-theme-next |
修改 theme
编辑 hexo/_config.yml,找到 theme 那一行配置,修改为 next
添加“分类”,“关于”和“标签”菜单
打开 tags,about,categories
在主题配置文件 next/_config.yml 在 menu 下去掉 tags,about,categories 注释。 注意这里“主题配置文件”指的是 themes/next 目录的下的 _config.yml。
创建 tags,about,categories
在 hexo 文件夹
1 | hexo new page tags |
会在 source 文件夹生成 tags 文件夹,编辑里面的 index.md ,添加
1 | type: "tags"comments: false |
同样的方法添加 categories; 添加 about 不需要修改 md 文件的 type,因为 tags,categories 是特殊目录类型,about 只是简单的一个 md。
参考 (References)
- https://www.youtube.com/watch?v=erKYtw4Rfhk